Table of Contents (25 sections)
Photography is a powerful medium that allows individuals to capture and convey stories, emotions, and experiences. Whether you're looking to pursue photography as a hobby or planning to become a professional photographer, mastering essential photography techniques is crucial. This guide will walk you through fundamental techniques every new photographer should know, enhancing both your skills and your photographs.
1. Understanding Exposure: Aperture, Shutter Speed, and ISO
Exposure is the heart of photography, determining how light or dark an image appears. It is influenced by three key factors: aperture, shutter speed, and ISO.
Aperture
The aperture is the opening in the lens through which light enters your camera. Understanding f-stops is essential: a lower f-stop (like f/2.8) means a wider aperture, allowing more light in, and creating a shallow depth of field. This is ideal for portraits where you want a blurred background. Conversely, a higher f-stop (like f/16) narrows the aperture, allowing less light in and increasing the depth of field, which is perfect for landscapes where you want everything in focus.
Shutter Speed
Shutter speed controls how long the camera's sensor is exposed to light. A fast shutter speed (e.g., 1/1000 sec) freezes action, making it ideal for sports or wildlife photography. Slow shutter speeds (e.g., 1/4 sec) can create motion blur, which adds a sense of movement to your photos, particularly useful in photography of waterfalls or flowing rivers.
ISO
ISO measures the camera sensor's sensitivity to light. Lower ISO settings (e.g., 100) are best for bright conditions, while higher settings (e.g., 3200) are used in low-light situations. However, increasing the ISO can introduce noise, which is something you should always consider when preparing your shot.
Tip: Always try to balance these three elements for perfectly exposed photos. Utilize the exposure triangle to understand how changing one affects the others.
2. Mastering Composition Techniques
Composition is about arranging elements within your frame to create a compelling photograph. Here are key techniques you should practice:
Rule of Thirds
This fundamental guideline involves dividing your image into a three-by-three grid. Positioning your subject along these lines or at their intersections often creates more tension, energy, and interest in the composition.
Leading Lines
Utilize natural lines in your environment to lead the viewer's eye towards the subject. Roads, paths, rivers, and architectural elements can serve as guiding lines that enhance your composition.
Framing
Use objects or elements within your scene to create a frame around your subject. Trees, doorways, or bridges can draw focus to your subject and add depth to the image.
These composition techniques not only enhance the aesthetic appeal of your photographs but also communicate the intended message more clearly.
📺 For further exploration: Check out "Photography Composition Techniques for Beginners" on YouTube for visual examples and tips!
3. Utilizing Natural Light
Natural light is one of the most important elements in photography. Understanding how to use it effectively can drastically improve your images. Here are some tips to consider:
Timing
The golden hours—shortly after sunrise and before sunset—provide soft, golden light that is very flattering for portraits and landscapes. Harsh midday sunlight can create unwanted shadows, so if you're shooting during these hours, look for shaded areas or use reflectors to diffuse the light.
Direction
The direction of light affects shadows and highlights in your photograph. Side lighting can add depth, while backlighting can create silhouettes or add a halo effect around your subject.
Weather Conditions
Don't shy away from cloudy days; overcast skies diffuse sunlight, resulting in soft, even light ideal for certain types of photography, such as portraiture.
Common Mistake: Avoid using your flash in bright daylight as it can overexpose your subject and create unnatural lighting effects.
4. Learning Post-Processing Basics
Once you've captured your photos, the next step is post-processing. Programs like Adobe Photoshop and Lightroom allow you to enhance your images. Here’s a breakdown of key editing techniques:
Cropping and Straightening
Often, an image may benefit from cropping to enhance composition. Straightening can also eliminate distractions if the horizon is tilted.
Adjusting Exposure and Contrast
Fine-tuning the exposure can recover details lost in highlights or shadows, while contrast adjustments make your image pop!
Color Correction
Corrections can adjust inaccuracies in the photo's colors. This is essential if you’ve shot under unnatural light (like fluorescent lighting), which can cast an unpleasant tone.
Sharpening
Sharpening enhances the edges within your photo, making it look clearer, though over-sharpening can introduce unwanted artifacts.
Pro Tip: Always work on copies of your original images to avoid irreversible damage.
5. Keeping Your Gear in Check
Before venturing out to take photos, ensure your equipment is in optimal condition:
Regular Maintenance
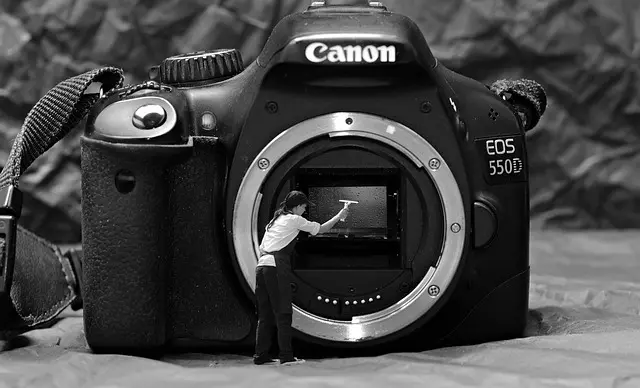
Clean your lenses and sensor periodically to avoid dust spots in your images.
Battery and Memory Check
Always carry extra batteries and memory cards. Sudden power loss or a full card can ruin a photo opportunity.
Familiarize Yourself with Your Gear
Take the time to learn the strengths and weaknesses of your camera and accessories. The better you know your tools, the more effectively you can use them during crucial moments.
Checklist Before Every Photography Session
- [ ] Double-check battery charge
- [ ] Ensure memory cards have enough space
- [ ] Clean lenses
- [ ] Carry essential accessories (tripod, filters)
- [ ] Confirm settings are adjusted based on lighting conditions
Glossary
| Term | Definition |
|---|---|
| Aperture | The opening in the lens that controls the amount of light entering the camera. |
| Shutter Speed | The duration the camera's sensor is exposed to light, affecting motion blur. |
| ISO | The measure of the camera sensor's sensitivity to light. |
🧠 Quick Quiz: What does a higher f-stop number do?
- A) Allows more light in
- B) Increases depth of field
- C) Decreases exposure
Answer: B — A higher f-stop number decreases the aperture size, resulting in a greater depth of field.
By applying these essential photography techniques and consistently practicing them, you'll see a significant improvement in your photos, enabling you to express your creative visions more effectively. Happy shooting!
📺 Pour aller plus loin : essential photography techniques for beginners sur YouTube